
Pro Gel Nail Kit: How to Do Gel Nails Like a Professional
Table of Contents
- What Makes a Real Professional Gel Nail Kit?
- Why Australian Nail Lovers Are Ditching the Salon
- Inside Your Pro Gel Nail Kit: The Full Arsenal
- How to Do Gel Nails Professionally: The Prep Game
- The Professional Prep Routine
- The Professional Application Method
- No Base or Top Coat Needed!
- Pro Secrets for Next-Level Results
- Troubleshooting Like a Pro
- The Bottom Line

What Makes a Real Professional Gel Nail Kit?
Let's be honest — we've all been there. You book a nail appointment, spend your lunch break at the salon, drop $80+ on a manicure, and then chip it reaching for your keys. The cycle continues until you're basically funding your nail tech's holiday to Bali.
Enter the game-changer: a professional gel nail kit with UV light that actually delivers salon results. Not the “salon-inspired” nonsense you see at the chemist. We're talking about the real deal — the same quality tools and formulas your nail tech guards like state secrets.
Why Australian Nail Lovers Are Ditching the Salon
Here in Australia, we're practical people. We want quality, we want it to last through beach days and BBQs, and we definitely don't want to remortgage the house for nice nails. That's exactly why more Aussies are investing in a proper professional gel nail kit with UV/LED lights instead of endless salon visits.
Think about it: one kit, unlimited manicures, zero awkward conversations about your weekend plans while someone files your nails. Plus, you can do your nails at midnight watching Love Island reruns. Try asking your salon for that service.
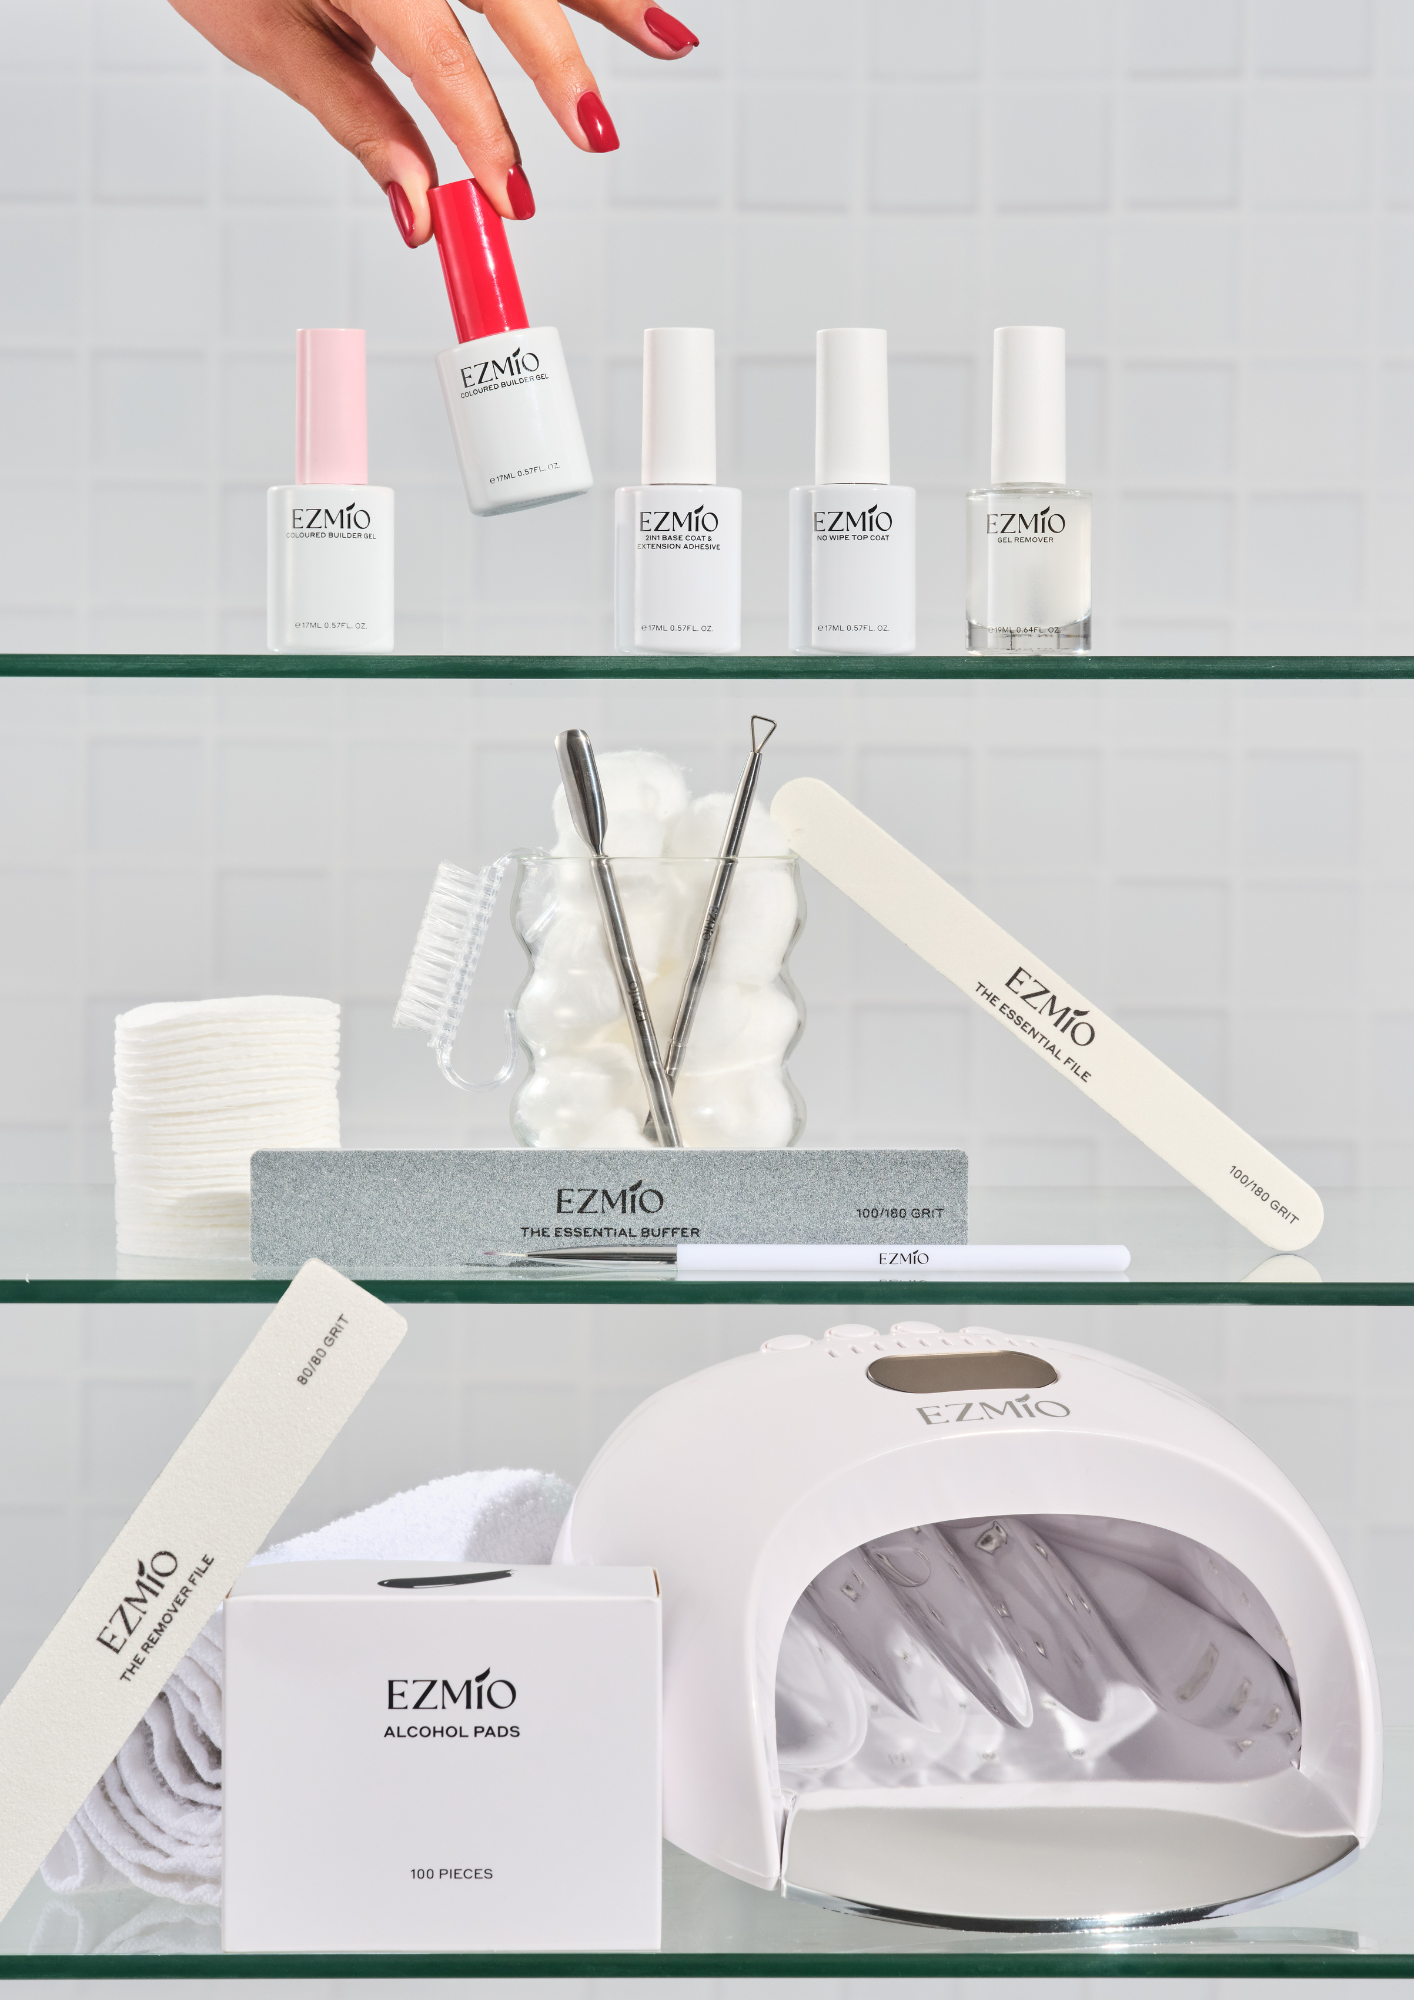
Inside Your Pro Gel Nail Kit: The Full Arsenal
This isn't some starter pack that leaves you googling “why won't my gel polish cure properly” at 2am. The Pro Gel Nail Kit comes locked and loaded with everything:
- Nail Lamp UV LED — Professional-grade curing that actually works (goodbye, sticky disasters)
- The Essential Buffer & File — Precision shaping tools that don't shred your nails
- Cuticle Softener — Makes prep work a breeze
- Roll On Cuticle Oil — Hydration on the go (genius, right?)
- Nail Dehydrator — The secret to polish that actually sticks
- Pro Scraper Tool — For flawless cuticle work
- Pro Cuticle Pusher & Clipper — Salon-precision tools
- Pro Nail Cutter — Clean cuts every time
- Mini Nail Brush — Detail work made easy
- Alcohol Prep Pads x 4 — Clean slate guarantee
- Your Choice of 2 Colours — Pick from our massive range of gel, builder gel, or jelly gel shades
How to Do Gel Nails Professionally: The Prep Game
Here's what separates amateur hour from professional results: the prep. Your nail tech isn't gatekeeping — they're just meticulous about preparation. Lucky for you, we're spilling all the secrets.
The Professional Prep Routine
- Shape First, Polish Later: Start with the Pro Nail Cutter to get your length right. Then grab The Essential File and shape those tips. Pro tip: file in one direction, not back and forth like you're starting a fire.
- Cuticle Care Like You Mean It: Apply Cuticle Softener and let it work its magic for 30 seconds. Use the Pro Cuticle Pusher to gently push back cuticles, then carefully trim any excess with the Pro Cuticle Clipper. This step is what makes your manicure look like you have more nail bed than you actually do. Chef's kiss.
- Buff, Don’t Rough: Use The Essential Buffer to gently remove shine from your natural nail. You're creating texture for the polish to grip — not trying to file through to your nail bed.
- The Dehydration Station: Swipe on the Nail Dehydrator and let it evaporate. This removes oils and moisture that would otherwise cause your perfect mani to peel off in the shower tomorrow. If you prefer, you can wipe each nail with an Alcohol Prep Pad. Alcohol prep pads work especially well when you’re using Builder Gel.
The Professional Application Method
The Full Application Process
- Prep Like a Pro: For the perfect nail prep, follow the detailed routine above (or check our full Nail Preparation guide).
- Mix It Right: Gently roll your One Step Gel Polish bottle between your palms. Never shake it — bubbles are the enemy of smooth application.
- The Art of Application: Apply a thin layer of One Step Gel Polish with meticulous coverage. Maintain a slight distance from the cuticle and nail edges — about 4 mm — to prevent touching skin and to guarantee that pristine, professional finish.
- Cure: Cure for 60 seconds under your Nail Lamp UV LED.
- Build Opacity: Repeat until you reach your desired opacity. Some shades are one-coat wonders; others need two or three thin layers. Thin layers = no bubbles, no wrinkles.
- The Grand Finale: Apply Cuticle Oil and massage it in for a fresh-from-the-salon finish.
No Base or Top Coat Needed!
Here's the beauty of One Step Gel Polish — it's literally one step (okay, maybe two or three coats, but who's counting?). No base coat, no top coat — just pure colour that cures to a high-shine finish. It's gel nails for people who want professional results without the professional fuss.
Pro Secrets for Next-Level Results
- The 4 mm Rule: Keep all polish ~4 mm away from your skin. Use the Mini Nail Brush dipped in acetone for cleanup before curing. This prevents lifting and keeps the mani looking pro.
- The Cap Is King: Always cap the free edge. It's the difference between two days and two weeks of wear.
- Thin Wins: Three thin coats beat one thick, gloopy layer every time.
- Light Positioning: Keep your hand flat and fingers spread in the lamp. Don’t curl your fingers — every angle needs light exposure.
Troubleshooting Like a Pro
- Polish won’t cure properly? Layers are too thick, or your lamp needs replacing. The Nail Lamp UV LED in your kit is professional grade, so start by thinning layers.
- Peeling after a few days? Prep work likely wasn’t thorough, or oils touched the nail before application. Re-prep and dehydrate.
- Bubbles in your polish? You shook the bottle (roll it instead), applied too thick, or there’s dust on the nail.
The Bottom Line
Your Pro Gel Nail Kit isn't just another beauty purchase — it's an investment in nail independence. While everyone else is scheduling appointments around their nail tech's holiday schedule, you'll be doing professional gel nails at home whenever the mood strikes.
No more salon small talk. No more choosing between groceries and good nails. No more panic when you chip a nail the night before a big event. Just professional results, on your schedule, in your space.
Ready to join the thousands of Aussies who've already made the switch? Your Pro Gel Nail Kit is waiting, complete with everything you need to become your own nail tech. Choose your two favourite shades and show us your results — tag us so we can see how you’re absolutely nailing it at home!